> ## Documentation Index
> Fetch the complete documentation index at: https://koreai-agent-management-platform-dev.mintlify.app/llms.txt
> Use this file to discover all available pages before exploring further.
# Adding the Twilio Voice Channel
[Back to Third-Party Voice](/ai-for-service/channels#voice-channelsy)
To add Twilio Voice as a channel to your Kore.ai assistant, you must get a Twilio phone number and set up a webhook integration to communicate with the AI Agent.
## Before you begin
Twilio Voice for assistants is designed to work on voice-based channels. Before you enable Twilio Voice, note the following:
* Twilio Voice does not support enterprise AI Agents that require user authorization to communicate.
* Tasks that require the user's authorization to communicate with external systems must not be included.
* Webhook Nodes work asynchronously and are not supported on Twilio Voice.
* Use only dialog tasks for the best user experience.
* Configured responses for Twilio Voice are only brief and plain text messages.
* The VA receives the user's voice response from Twilio Voice only after a few moments of silence at the user's end, and this can appear as a lag for the end user.
## Prerequisites
* Create a new Twilio number to associate with your assistant through [Log in to your Twilio Voice account](https://www.twilio.com/) link.
* Buy a number by going to the Twilio **Account Dashboard** > **Develop** > **Phone Numbers** > **Manage** > **Buy a Number**.
* Twilio phone number. If you already have a Twilio phone number you want to associate with this VA, you can proceed to the next steps.
### Step 1: Configure the Integration in Twilio
To set up the integration:
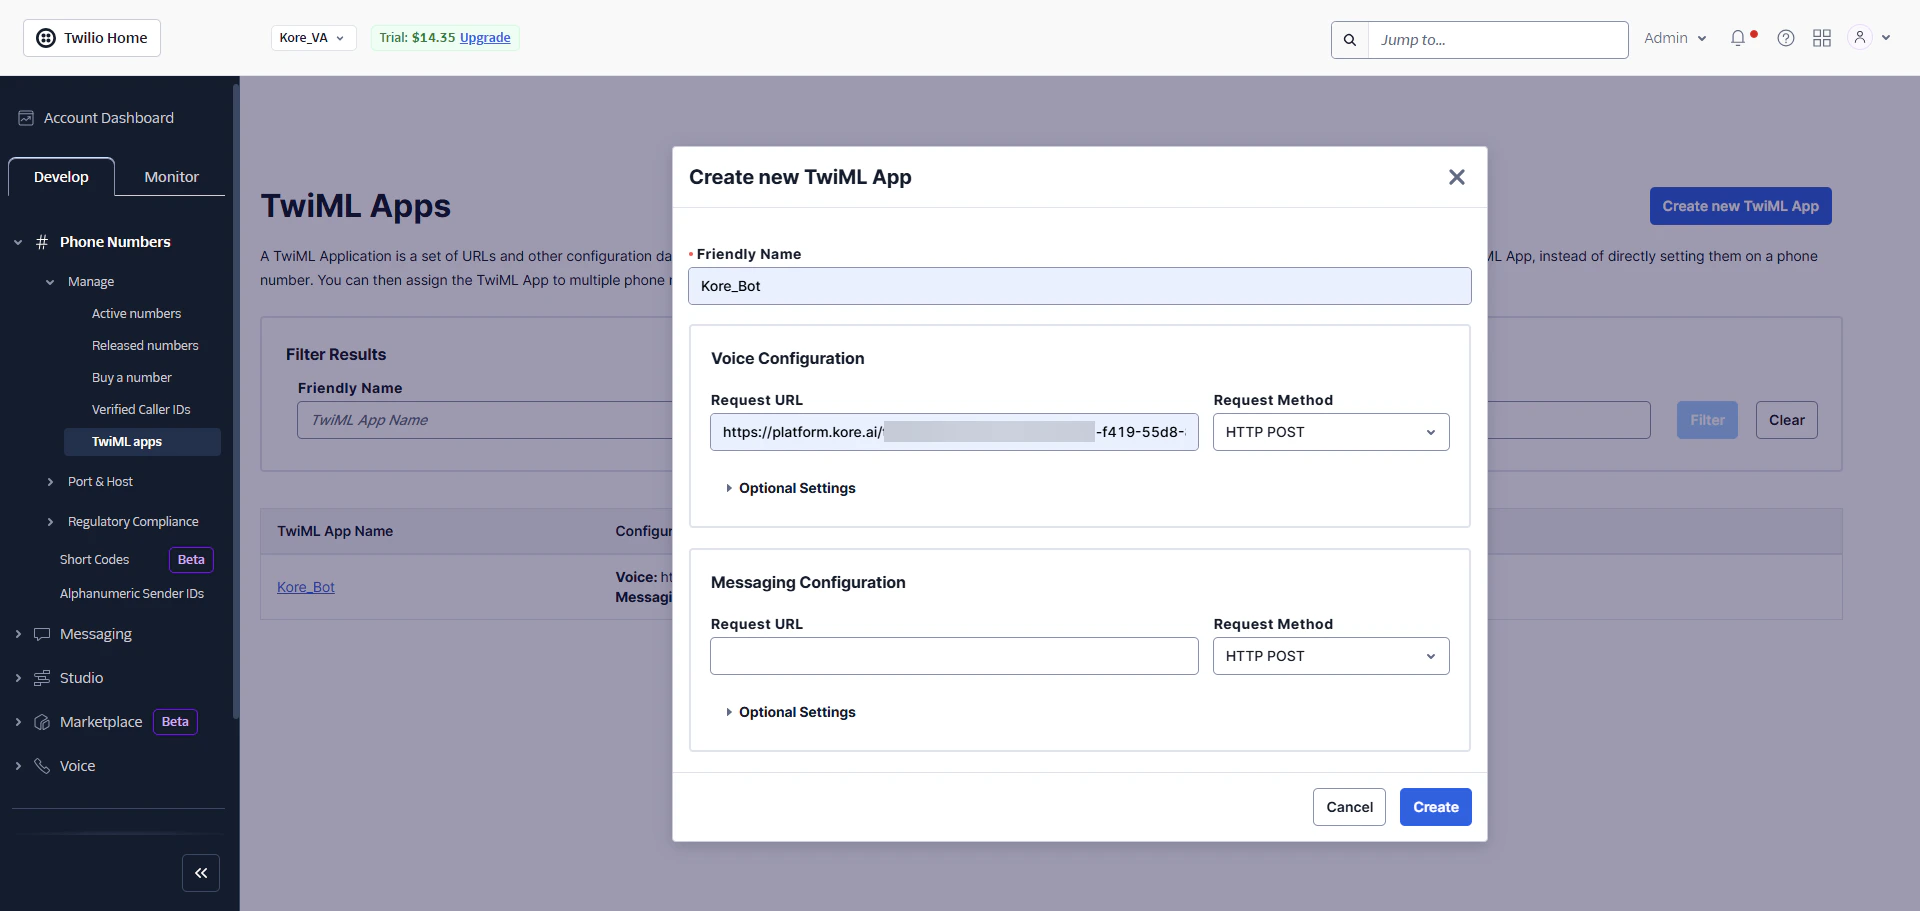
1. Go to Twilio **Account Dashboard** > **Develop** > **Phone Numbers** > **Manage** > **TwiML Apps** and click **Create New TwiML App**.
2. Enter a name for the app and copy the **Webhook URL** from the **Configurations** tab of the Twilio Voice Channel page (**Automation AI** > **Channels & Flows** > **Channels** > **Third Party Voice** > **All** > **Twilio Voice**) and enter in the **Request URL** field for the **Voice Configuration**.
3. Click **Create** to complete the app creation.
 ### Step 2: Associate a Phone Number
To associate the TwiML App with your Twilio Phone Number:
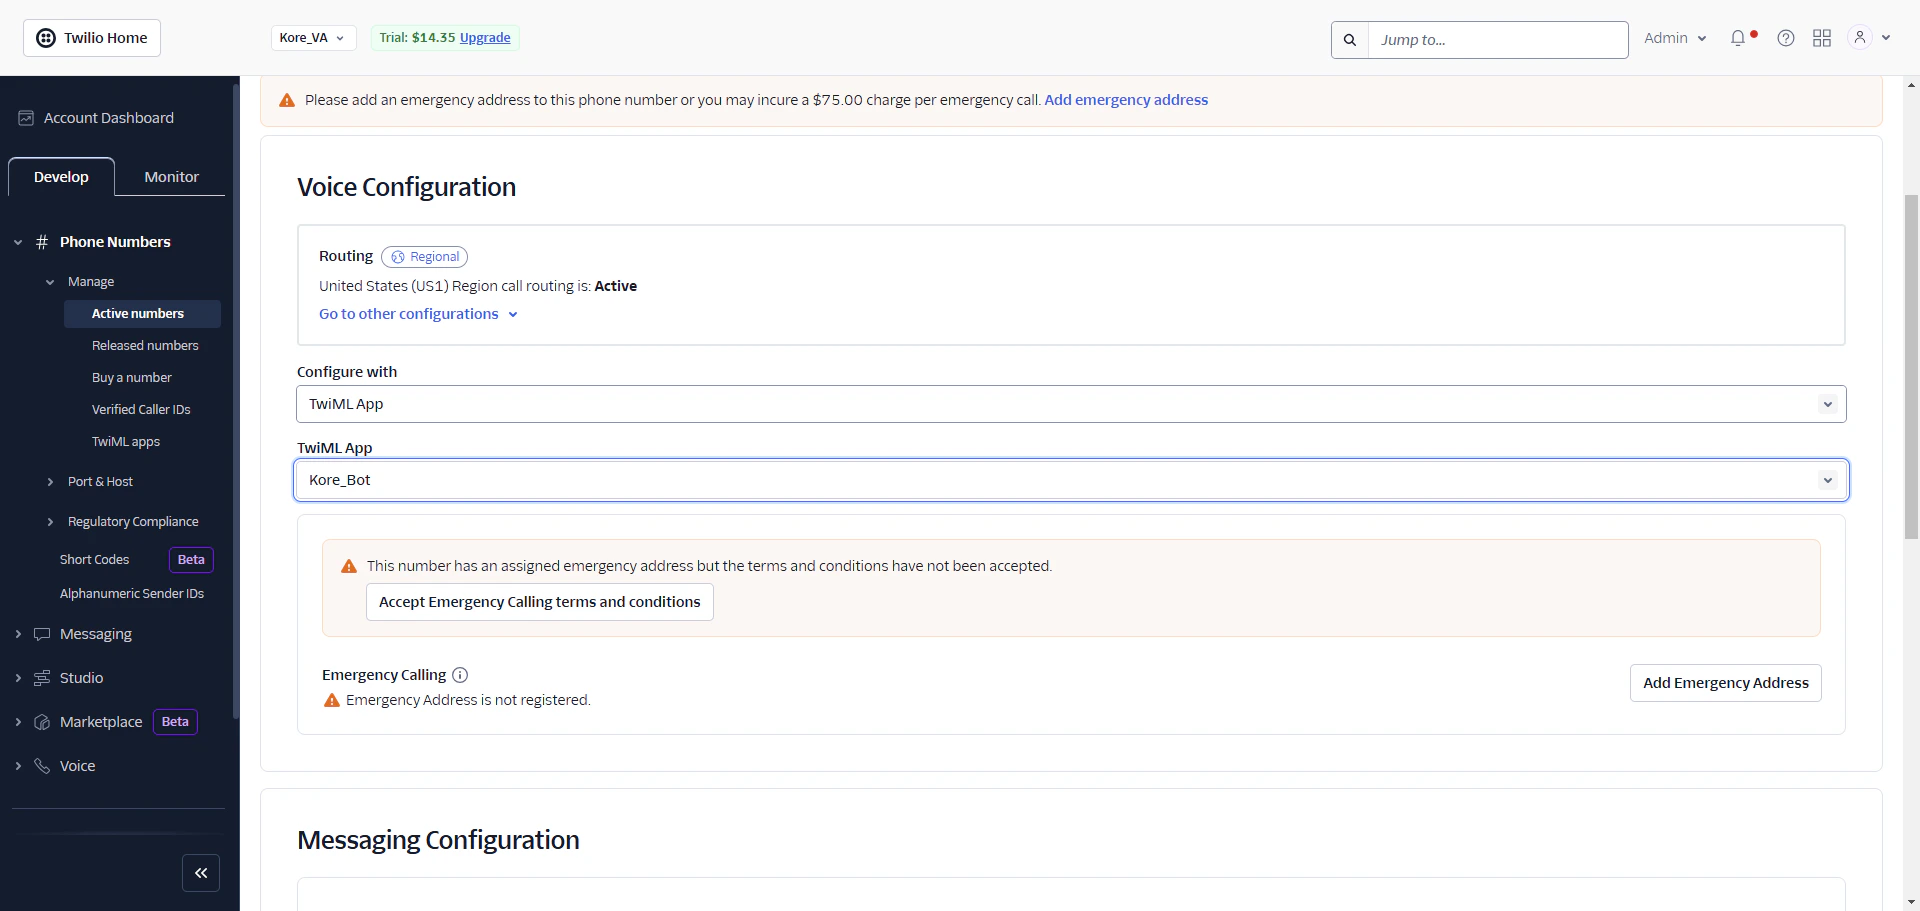
1. Go to Twilio **Account Dashboard** > **Develop** > **Phone Numbers** > **Manage** > **Active Numbers**.
2. **Select the number** you want to associate with the TwiML App from the Active Numbers section.
3. Select the **TwiML App** from the **Configure With** dropdown list in the Voice Configuration section.
4. The **TwiML App** field is displayed. Select the app you have configured in the previous steps.
5. Click **Save Configuration** to complete this app association.
### Step 2: Associate a Phone Number
To associate the TwiML App with your Twilio Phone Number:
1. Go to Twilio **Account Dashboard** > **Develop** > **Phone Numbers** > **Manage** > **Active Numbers**.
2. **Select the number** you want to associate with the TwiML App from the Active Numbers section.
3. Select the **TwiML App** from the **Configure With** dropdown list in the Voice Configuration section.
4. The **TwiML App** field is displayed. Select the app you have configured in the previous steps.
5. Click **Save Configuration** to complete this app association.
 ### Step 3: Set Up Agent Transfer (Optional)
Optionally, you can also set up **Agent Transfer** functionality to transfer the user’s call conversation to another Twilio number. To do this, you must configure the Kore.ai Agent Transfer SDK. Download the **Agent Transfer SDK** from the [Kore.ai GitHub repository](https://github.com/Koredotcom/BotKit) and define **data.message, transferCallToAgent**, and **agentPhonenumber** parameters.
1. **data.message**: Define the message to be read out to the end-user when the *call is transferred to the agent* is initiated.
2. **transferCallToAgent**: Set this flag to **True** to enable Agent Transfer and **False** to disable.
3. **agentPhonenumber**: Provide your Twilio phone number to which the user call conversation is transferred.
### Step 4: Enable the Twilio Voice Channel
To enable the Twilio Voice Channel:
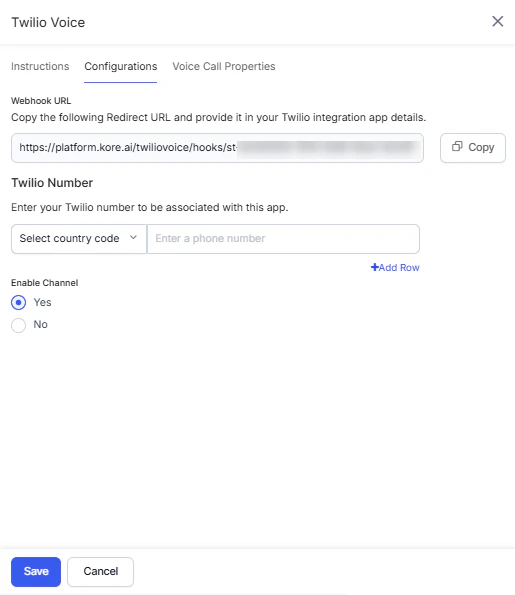
1. In the XO Platform, go to **Channels & Flows** > **Channels** > **Third Party Voice** > **All** > **Twilio Voice**.
2. To complete the Channel setup, go to the **Configurations** tab and pursue the following steps:
1. Enter your Twilio Number to associate with the Kore.ai assistant.
2. Select **Yes** in the **Enable Channel** section and then click **Save** to complete the user creation process and channel activation.
### Step 3: Set Up Agent Transfer (Optional)
Optionally, you can also set up **Agent Transfer** functionality to transfer the user’s call conversation to another Twilio number. To do this, you must configure the Kore.ai Agent Transfer SDK. Download the **Agent Transfer SDK** from the [Kore.ai GitHub repository](https://github.com/Koredotcom/BotKit) and define **data.message, transferCallToAgent**, and **agentPhonenumber** parameters.
1. **data.message**: Define the message to be read out to the end-user when the *call is transferred to the agent* is initiated.
2. **transferCallToAgent**: Set this flag to **True** to enable Agent Transfer and **False** to disable.
3. **agentPhonenumber**: Provide your Twilio phone number to which the user call conversation is transferred.
### Step 4: Enable the Twilio Voice Channel
To enable the Twilio Voice Channel:
1. In the XO Platform, go to **Channels & Flows** > **Channels** > **Third Party Voice** > **All** > **Twilio Voice**.
2. To complete the Channel setup, go to the **Configurations** tab and pursue the following steps:
1. Enter your Twilio Number to associate with the Kore.ai assistant.
2. Select **Yes** in the **Enable Channel** section and then click **Save** to complete the user creation process and channel activation.
 3. From the **Voice Call Properties** tab, enter the details to configure the channel-level voice properties. Click [here for more details](../automation/use-cases/dialogs/node-types/voice-call-properties.md#channel-settings).
### Related Links
For details regarding the configuration of voice properties at the Dialog Task level, refer to [Configuring Voice Call Settings for a Node](../automation/use-cases/dialogs/node-types/voice-call-properties.md#dialog-node-settings).
After the channel is enabled and all configurations are verified, you can optionally publish the assistant to make it available for end-users with the new channel. Learn more about [Publishing your App](/ai-for-service/deployment/publishing-app).
Built with [Mintlify](https://mintlify.com).
3. From the **Voice Call Properties** tab, enter the details to configure the channel-level voice properties. Click [here for more details](../automation/use-cases/dialogs/node-types/voice-call-properties.md#channel-settings).
### Related Links
For details regarding the configuration of voice properties at the Dialog Task level, refer to [Configuring Voice Call Settings for a Node](../automation/use-cases/dialogs/node-types/voice-call-properties.md#dialog-node-settings).
After the channel is enabled and all configurations are verified, you can optionally publish the assistant to make it available for end-users with the new channel. Learn more about [Publishing your App](/ai-for-service/deployment/publishing-app).
Built with [Mintlify](https://mintlify.com).